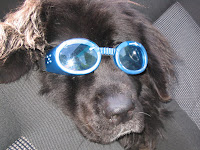
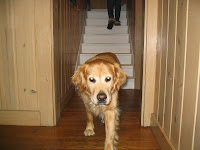
Step 7 - Replace 'pixels' with smaller images
Saturday, June 21, 2008
Thursday, June 19, 2008
Photomosaic Journal - Reverse Chronological
Wednesday, June 18, 2008
Photomosaic Journal - Reverse Chronological
Step 6 - Average Color
I created the following functions in Octave to compute the average color of my 13 smaller (9x9) images:
(1) Average Color Red Channel:
function[picR]=avgR(pic,maxR)
picR=round(255*sum(sum(pic(:,:,1)))/(maxR*size(pic,1)*size(pic,2));
end;
(2) Average Color Green Channel:
function[picG]=avgG(pic,maxG)
picG=round(255*sum(sum(pic(:,:,2)))/(maxG*size(pic,1)*size(pic,2));
end;
(3) Average Color Blue Channel:
function[picB]=avgB(pic,maxB)
picB=round(255*sum(sum(pic(:,:,3)))/(maxB*size(pic,1)*size(pic,2));
end;
where pic=imread("smallaveragecolorpic.png");
max(pic)
ans(:,:,1)=maxR
ans(:,:,2)=maxG
ans(:,:,3)=maxB.
To recall: avgR(pic,maxR); avgG(pic,maxG); avgB(pic,maxB).
Average Color = (avgR, avgG, avgB).
Step 5 - Shrink/Crop Pictures from Step 4
I combined code from Assignment #7 (shrink2 - nearest neighbor) and Assignment #8 (shrinkd - scale an image in x and y by different factors) to reduce the size of my 'replacement pictures' to 9x9 squares, since I enlarged my image by a factor of r=9 in Step 3. The code:
function[S]=shrink2(pic,f1,f2,newpic)
Mp=floor(size(pic,1)*f1);
Np=floor(size(pic,2)*f2);
for i=1:Mp;
for j=1:Np;
a=round(i/f1);
b=round(j/f2);
for k=1:3;
S(i,j,k)=pic(a,b,k);
endfor;
endfor;
endfor;
imwrite(newpic, double(S)(:,:,1)/255, double(S)(:,:,2)/255, double(S)(:,:,3)/255);
endfunction;
A=imread("averagecolorpic.png");
shrink2(A, 9/size(A,1), 9/size(A,2), "smallaveragecolorpic.png").
Once the images are reduced to the pixel size (9x9) in my enlarged image from Step 3, it is impossible to tell what the original image was - dissapointing. In other words, it did not really matter that I just created the desired colors using the six images below, rather than finding images that actually had a dominant color purple, for example.
Step 4 - Finding Pictures to Replace Pixels in Image
I plan to use the following six images to replace each of the 13 colors in my photomosaic. I will mimic the colors using GIMP, so that the average colors are one of the 13 possible colors. In GIMP, Color>Levels>Channel>RGB>Output level (enter the color values). Note: Some images did not require level adjusting to obtain accurate average colors. Above each image are the colors they will replace.
black, grey, light grey:

My enlarged, reduced color image has 13 colors, determined by examining the pixels in zoom mode, and cross-referencing this with the matrix values displayed in Octave. Color chips below created in GIMP by opening a 100x100 chip file and using the bucket fill tool. Tools->Paint tools->Bucket Fill->Change Foreground Color->entered corresponding RGB values.
I created the following functions in Octave to compute the average color of my 13 smaller (9x9) images:
(1) Average Color Red Channel:
function[picR]=avgR(pic,maxR)
picR=round(255*sum(sum(pic(:,:,1)))/(maxR*size(pic,1)*size(pic,2));
end;
(2) Average Color Green Channel:
function[picG]=avgG(pic,maxG)
picG=round(255*sum(sum(pic(:,:,2)))/(maxG*size(pic,1)*size(pic,2));
end;
(3) Average Color Blue Channel:
function[picB]=avgB(pic,maxB)
picB=round(255*sum(sum(pic(:,:,3)))/(maxB*size(pic,1)*size(pic,2));
end;
where pic=imread("smallaveragecolorpic.png");
max(pic)
ans(:,:,1)=maxR
ans(:,:,2)=maxG
ans(:,:,3)=maxB.
To recall: avgR(pic,maxR); avgG(pic,maxG); avgB(pic,maxB).
Average Color = (avgR, avgG, avgB).
Step 5 - Shrink/Crop Pictures from Step 4
I combined code from Assignment #7 (shrink2 - nearest neighbor) and Assignment #8 (shrinkd - scale an image in x and y by different factors) to reduce the size of my 'replacement pictures' to 9x9 squares, since I enlarged my image by a factor of r=9 in Step 3. The code:
function[S]=shrink2(pic,f1,f2,newpic)
Mp=floor(size(pic,1)*f1);
Np=floor(size(pic,2)*f2);
for i=1:Mp;
for j=1:Np;
a=round(i/f1);
b=round(j/f2);
for k=1:3;
S(i,j,k)=pic(a,b,k);
endfor;
endfor;
endfor;
imwrite(newpic, double(S)(:,:,1)/255, double(S)(:,:,2)/255, double(S)(:,:,3)/255);
endfunction;
A=imread("averagecolorpic.png");
shrink2(A, 9/size(A,1), 9/size(A,2), "smallaveragecolorpic.png").
Once the images are reduced to the pixel size (9x9) in my enlarged image from Step 3, it is impossible to tell what the original image was - dissapointing. In other words, it did not really matter that I just created the desired colors using the six images below, rather than finding images that actually had a dominant color purple, for example.
Step 4 - Finding Pictures to Replace Pixels in Image
I plan to use the following six images to replace each of the 13 colors in my photomosaic. I will mimic the colors using GIMP, so that the average colors are one of the 13 possible colors. In GIMP, Color>Levels>Channel>RGB>Output level (enter the color values). Note: Some images did not require level adjusting to obtain accurate average colors. Above each image are the colors they will replace.
black, grey, light grey:

My enlarged, reduced color image has 13 colors, determined by examining the pixels in zoom mode, and cross-referencing this with the matrix values displayed in Octave. Color chips below created in GIMP by opening a 100x100 chip file and using the bucket fill tool. Tools->Paint tools->Bucket Fill->Change Foreground Color->entered corresponding RGB values.
Subscribe to:
Comments (Atom)


