Saturday, June 21, 2008

Photomosaic Journal - Reverse Chronological

Step 7 - Replace 'pixels' with smaller images


Thursday, June 19, 2008

Photomosaic Journal - Reverse Chronological

Step 6 - Average Color Images
I resized the 9x9 images in this blog so that they could actually be seen.

(214, 128, 42)


(128, 128, 42)


(214, 214, 128)


(128, 42, 42)


(214, 128, 128)


(128, 42, 128)


(214, 128, 214)


(42, 42, 128)


(42, 128, 214)


(42, 128, 128)


(42, 42, 42)


(128,128,128)


(214,214,214)

Wednesday, June 18, 2008

Photomosaic Journal - Reverse Chronological

Step 6 - Average Color
I created the following functions in Octave to compute the average color of my 13 smaller (9x9) images:
(1) Average Color Red Channel:
function[picR]=avgR(pic,maxR)
picR=round(255*sum(sum(pic(:,:,1)))/(maxR*size(pic,1)*size(pic,2));
end;
(2) Average Color Green Channel:
function[picG]=avgG(pic,maxG)
picG=round(255*sum(sum(pic(:,:,2)))/(maxG*size(pic,1)*size(pic,2));
end;
(3) Average Color Blue Channel:
function[picB]=avgB(pic,maxB)
picB=round(255*sum(sum(pic(:,:,3)))/(maxB*size(pic,1)*size(pic,2));
end;
where pic=imread("smallaveragecolorpic.png");
max(pic)
ans(:,:,1)=maxR
ans(:,:,2)=maxG
ans(:,:,3)=maxB.
To recall: avgR(pic,maxR); avgG(pic,maxG); avgB(pic,maxB).
Average Color = (avgR, avgG, avgB).

Step 5 - Shrink/Crop Pictures from Step 4
I combined code from Assignment #7 (shrink2 - nearest neighbor) and Assignment #8 (shrinkd - scale an image in x and y by different factors) to reduce the size of my 'replacement pictures' to 9x9 squares, since I enlarged my image by a factor of r=9 in Step 3. The code:
function[S]=shrink2(pic,f1,f2,newpic)
Mp=floor(size(pic,1)*f1);
Np=floor(size(pic,2)*f2);
for i=1:Mp;
for j=1:Np;
a=round(i/f1);
b=round(j/f2);
for k=1:3;
S(i,j,k)=pic(a,b,k);
endfor;
endfor;
endfor;
imwrite(newpic, double(S)(:,:,1)/255, double(S)(:,:,2)/255, double(S)(:,:,3)/255);
endfunction;
A=imread("averagecolorpic.png");
shrink2(A, 9/size(A,1), 9/size(A,2), "smallaveragecolorpic.png").

Once the images are reduced to the pixel size (9x9) in my enlarged image from Step 3, it is impossible to tell what the original image was - dissapointing. In other words, it did not really matter that I just created the desired colors using the six images below, rather than finding images that actually had a dominant color purple, for example.

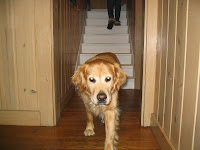
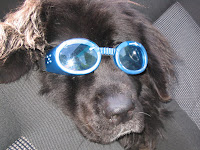
Step 4 - Finding Pictures to Replace Pixels in Image

I plan to use the following six images to replace each of the 13 colors in my photomosaic. I will mimic the colors using GIMP, so that the average colors are one of the 13 possible colors. In GIMP, Color>Levels>Channel>RGB>Output level (enter the color values). Note: Some images did not require level adjusting to obtain accurate average colors. Above each image are the colors they will replace.

orange, beige, salmon:

maroon:

purple, light purple:

olive green:

blue, aqua, teal:

black, grey, light grey:


My enlarged, reduced color image has 13 colors, determined by examining the pixels in zoom mode, and cross-referencing this with the matrix values displayed in Octave. Color chips below created in GIMP by opening a 100x100 chip file and using the bucket fill tool. Tools->Paint tools->Bucket Fill->Change Foreground Color->entered corresponding RGB values.
(214, 128, 42)
(128,128,42)
(214,214,128)

(128, 42, 42)
(214,128,128)

(128,42,128)

(214,128,214)

(42, 42, 128)
(42,128,214)
(42,128,128)

(42, 42, 42)
(128,128,128)
(214,214,214)

Friday, June 13, 2008

Photomosaic Journal - Reverse Chronological

Step 1-3 in .png

I used the large2 function, as described below, to enlarge the image by r=9 and saved the file as .png using imwrite. The image below looks much simpler to replace the pixels in, and imread("large27.png") displays the matrix with reduced color values in the range {42, 128, 214}.
545x410


I reduced the image color to at most 27 colors using the same function as in Step 2 below, but saving the image as a .png file. In this way, imread("small27.png") displays a matrix with values only in the range {42, 128, 214}, as desired. It is more visible that colors have been reduced (versus when file was save as .jpg) in the image below:

61x46

I used the shrink2 function, with f=0.03 instead of f=0.04 because when the image was saved as .png using imwrite the resolution was clearer, to create the 61x46 image below:
61x46

Step 3 - Enlarge the Image
I used the large2 function created in Assignment 8, which enlarges an image by sending each pixel to its nearest neighbor. For the smaller image, originally 40x30, I used a factor of 10; for the larger image, originally 81x61, I used a factor of 8. The new image sizes are beside each picture below. The images were saved using imwrite(newpic,double(L)(:,:,1)/255,double(L)(:,:,2)/255,double(L)(:,:,3)/255) within the large2 function. It is definitely easier to see Bannock in his "Doggles" in the image enlarged from the 81x61 pic.

644x484
395x295
Step 2 - Reduce Image Color
I used the following code to reduce the shrunken images to 27 colors:
A=imread("smalldoggles.jpg");
B=floor(double(A)/86)*86+42;
imwrite("smalldoggles27.jpg",double(B)(:,:,1)/255,double(B)(:,:,2)/255,double(B)(:,:,3)/255).

Reducing the image color, in both cases, further distorted the resolution of the images, so that it is a little harder to tell what the pictures are of. It is looking like I may go with the 81x61 image.


Step 1 - Shrink the Image
I used the shrink2 function created in Assignment 7, which scales down an image by sending each pixel to its nearest neighbor. A 20 x 20 image had too poor a resolution, even using this high contrast picture. The 81 x 61 is obviously more clear than the 40 x 30, but I think the image resolution is preserved enough in the 40 x 30 to be able to make out the picture. I will try the remaining steps on each to decide which size to use. It is hard to see here, but the resolution has been reduced in each picture so that individual pixels are more visible than the original.
81 x 61
f=0.04

40x30
f=0.02

Step 0 - Choose your picture
  • This is Bannock, and these are his "Doggles", worn when the top is down

2048 x 1536


  • This is Ursa, in her "Doggles", I hope to use her pic to replace some the pixels in the background